What it solves and why you would use it
Opening coordination needs traceable host/source relationships, repeatable sizes and controlled updates. This tool records source identities and a stable coordination ID, exposes the proposed changes before placement, and reports cases that need review.
Before you start
Install the plug-in for your version of Revit and open a sample model.
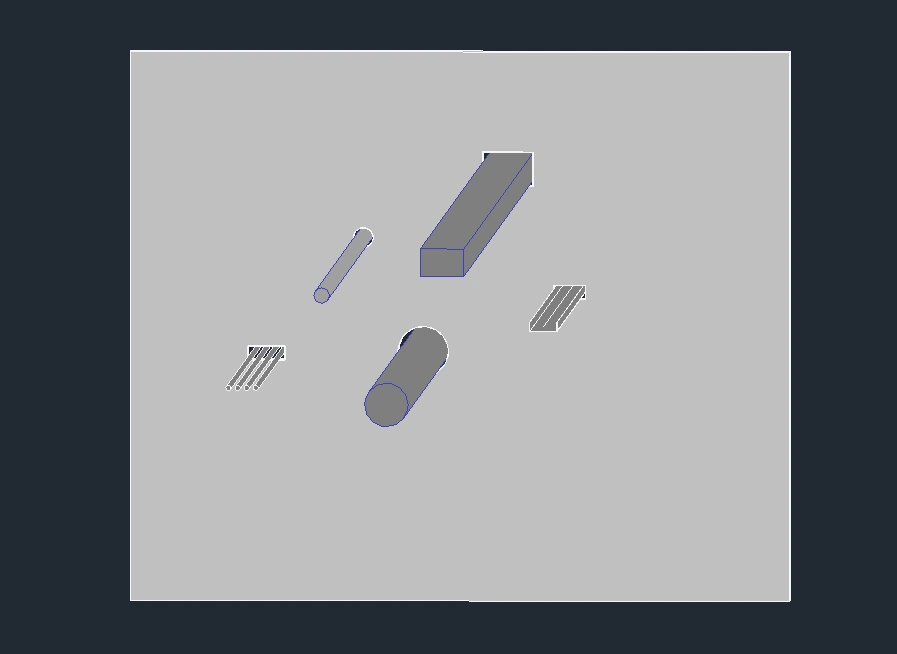
One wall, one floor, a linked round pipe and rectangular duct, plus one previously tracked opening.
Open the tool: EZ-VDC > Penetrations.
Worked workflows
Example: review individual duct and pipe wall crossings
- Enable the relevant MEP sources and Walls; choose one view/level range. Clear Combine if the intended result is one opening per crossing.
- Set each discipline’s total clearance and project metadata. Check Wall Round and Wall Rectangular family mappings.
- Scan. Inspect Source IDs, host, dimensions, angle and Notes; zoom into representative rows.
- Apply the selected valid rows. Inspect host alignment and parameter values, then export the result CSV.
Expected result: Traceable round/rectangular penetrations for the reviewed crossings.
Example: update after a MEP revision
- Reload the source models and reuse the intended preset/scope.
- Scan again and distinguish Update, Replace, Orphan and Blocked. Review pinned or dependent instances before selecting replacements.
- For a combine/split change, inspect all member IDs and select the complete required action set.
- Apply and review results. Review orphan instances separately; the tool does not delete them automatically.
Expected result: A controlled revision with stable coordination identities and explicit review of unresolved cases.
Every button and parameter
Open a window or tab below to find its controls. Interface names match the plug-in; you can also search by function or unit.
31 of 31 reference entries
Configure sources and host scope
9 entries
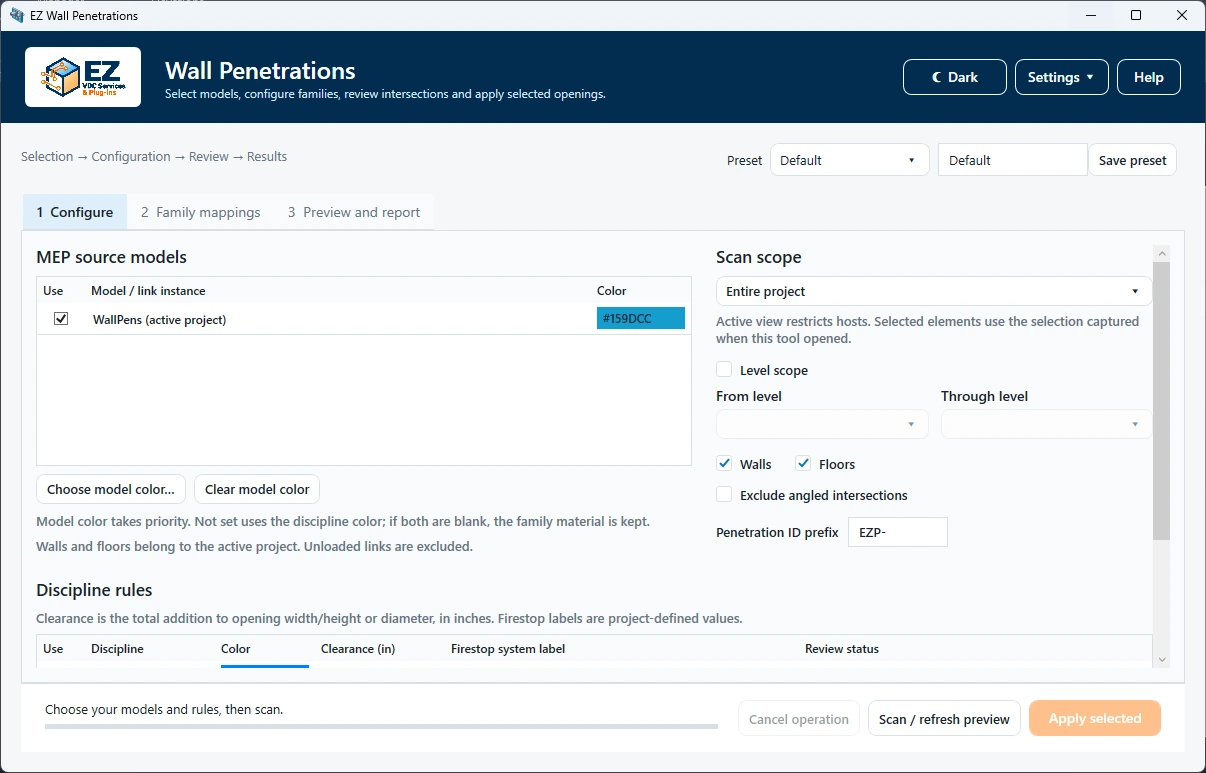
Hosts are walls/floors in the current project; MEP can come from selected loaded models. Preview does not edit the model.
- Preset · Picker / Name / Save preset
- Load a saved configuration, enter a name and Save preset to retain a reusable setup. Verify source instances, levels and loaded families after loading a preset in another project.
- Configure / Family mappings / Preview and report
- Configure chooses scope/rules; Family mappings defines the four shape/host combinations; Preview and report shows proposed actions and results. Changing scan settings requires a fresh preview before applying.
- Sources · Use / Model or link instance
- Use enables each host/link source for MEP scanning. The model label identifies the instance, not just the linked file. Unloaded sources cannot be scanned and are not treated as proof of deleted source elements.
- Sources · Color / Choose / Clear
- Choose a model color override; Clear returns it to Not set. Color priority is model override, then discipline color, then family material. Mixed-source combined openings use the first listed source color.
- Scope
- Entire project scans eligible hosts broadly. Active view limits host scope to that view. Selection uses the selection captured when opening the tool, which can contain host/source elements or link instances. Verify the resulting preview rather than assuming a later selection changed the captured scope.
- Level scope · From / To
- Optional inclusive story range. Choose the first and last levels; the physical range includes the last selected story up to the next level. Review cross-story items near the range limits.
- Walls / Floors / Exclude angled intersections
- Walls and Floors enable the corresponding current-project hosts. Exclude angled intersections omits oblique crossings; leave clear when you intend supported angled penetrations and inspect their footprint/angle.
- Penetration ID prefix
- Prefix for generated coordination IDs, such as EZP. These IDs identify managed openings across updates; do not confuse them with native Revit element IDs.
- Combine nearby items of the same discipline · Gap (in)
- Enabled by default with a 4 in gap. Groups nearby crossings on the same host face and within the same discipline into a shared rectangular opening. Gap is edge-to-edge before clearance, including insulation and host travel. Different disciplines remain separate. Inspect member Source IDs before approving.
Discipline rules
4 entries
Each enabled discipline contributes crossings and metadata. Dimensions shown in this tool are inches.
- Rules · Use / Discipline
- Use enables the named discipline. Clear it to exclude its sources from this scan. Discipline also controls which crossings may share a combined opening.
- Rules · Color / Choose / Clear
- Set a discipline material color or clear it. A source-model color overrides it; no model/discipline color leaves the family material in charge.
- Clearance (in)
- Total increase to opening dimensions, not clearance per side. For example, 2 in adds 2 in to the relevant size overall; it does not add 2 in at both edges. Check the calculated preview dimensions with insulation included.
- Firestop system label / Review status
- Project-defined text written through the selected parameter mappings and included in reports. Enter your actual system label/status; a label does not establish suitability of a tested firestop assembly.
Family mappings and writable parameters
8 entries
Configure Wall Round, Wall Rectangular, Floor Round and Floor Rectangular independently. A combined opening needs the appropriate rectangular mapping.
- Family name / Type name
- Specify the family/type used for this slot. A blank family selects the bundled family with its default mappings. Custom families need compatible placement and writable instance parameters.
- Loaded type / Use loaded type
- Choose an available project type and click Use loaded type to populate that mapping. Inspect the placement mode and dimensions afterwards; a selected type alone does not validate the family.
- Family file · Browse / Path
- Browse selects an RFA file for a family not yet loaded, or enter its path. Preview checks availability; loading belongs to the apply stage.
- Placement · Hosted / Face
- Must match the family’s hosting behavior. Sloped hosts require a compatible face-based family. An incompatible mapping produces Blocked/review rows rather than a guessed placement.
- Origin · Center / Bottom / Extra offset (in)
- Center or Bottom describes the family origin relative to the opening. Extra offset moves it in the opening plane; for a wall, positive moves up and negative down. It is not an offset through wall thickness. Inspect custom-family alignment.
- Width / Height / Depth / Diameter parameters
- Choose writable instance Length parameters. Width follows the family’s local X axis; Height and Diameter represent opening size, while Depth represents host travel. Use the correct round/rectangular dimensions for the slot.
- Material parameter
- Choose a writable Material instance parameter when color/material assignment is needed. Blank optional mappings are skipped. Materials are created or assigned during Apply, not Scan.
- ID / Firestop / Status / Fire rating / System parameters
- Map each metadata field to the corresponding writable instance parameter: coordination ID, project firestop label, review status, host fire rating and MEP system respectively. Leave optional fields blank when the family does not store them; do not map several meanings to one parameter.
Preview and report controls
10 entries
Scan calculates proposed geometry and reconciliation. Apply is a separate explicit operation.
- Scan / refresh preview
- Reads geometry and settings without model changes. Refresh after scope, rules, mapping or source geometry changes. Creates proposed actions and validation notes for review.
- Row checkbox / Apply header
- Selects applicable actions. Create, Update and Replace are normally checked; review-only rows are excluded. The tri-state header selects or clears eligible rows. A merge/split must have complete coverage; partial split selection is blocked.
- Action / ID / Result
- Action is Create, Update, Replace, Unchanged, Orphan or Blocked. ID is the stable coordination identity. Result explains execution after Apply. Orphan and Blocked require review; orphans are never automatically deleted.
- Discipline / Host / Source model / Source IDs
- Read-only provenance: trade, current-project host, source instance and contributing MEP identities. Combined rows list multiple members. Use these to confirm the intended crossings and investigate duplicate or unexpected results.
- Width / Height / Diameter (in) / Angle (°)
- Calculated opening dimensions in inches and crossing angle in degrees. Round and rectangular shapes populate the relevant dimensions. Inspect these before Apply, especially for oblique or combined crossings.
- Review status / Family / Notes
- Show assigned status, proposed family and validation/reconciliation reasons. Read Notes for blocked, pinned, dependent or incompatible-family cases; changing a checkbox cannot make invalid geometry valid.
- Zoom to row / Double-click row
- Locates the row’s geometry in Revit for visual inspection. It helps you confirm the crossing and host before committing model edits.
- Export CSV…
- Exports preview/result rows for review, including provenance and dimensions. Dimensions are inches; internal-coordinate fields in the report use Revit feet. Choose the report stage you want to share.
- Apply selected
- Applies only checked valid actions. Compatible updates keep native IDs; incompatible recreation keeps the coordination ID but may replace the native element. Failed rows roll back their own work; related split work is handled together. Read every Result and Notes entry.
- Cancel operation
- During Apply, cancellation rolls back the entire apply batch. During scanning it stops analysis. Closing or scanning alone does not place families.
Check the result
- Inspect a wall and a floor opening in section. Confirm footprint, material, ID and source members, including any combined opening; compare the final CSV with the selected actions.
Troubleshooting and limits
- Supported scanning uses straight MEP centerlines and planar host geometry. Nested links are not traversed recursively. Nearly parallel, unsupported or incompatible crossings are reported for review. Unloaded/out-of-scope sources are protected from false orphan classification.
Running it again
Tracked updates preserve coordination identity where possible. Orphans are review-only and never automatically deleted; Cancel operation rolls back the entire apply batch.