What it solves and why you would use it
Repeated opening framing is time-consuming to model and easy to leave out of coordination. The tool derives opening sizes and stud extents from the chosen model, previews changes and maintains its own framing after revisions.
Before you start
Install the plug-in for your version of Revit and open a sample model.
Two doors, one window and one wider opening in stud walls, plus a slab above them.
Open the tool: EZ-VDC > King Studs.
Worked workflows
Example: maintain door framing on one floor
- Choose the architectural source, Doors, one phase and one level. Enable a wall-type keyword filter matching your framed walls.
- Enter the double-stud threshold and choose Update. Preview and inspect new/changed/removed counts.
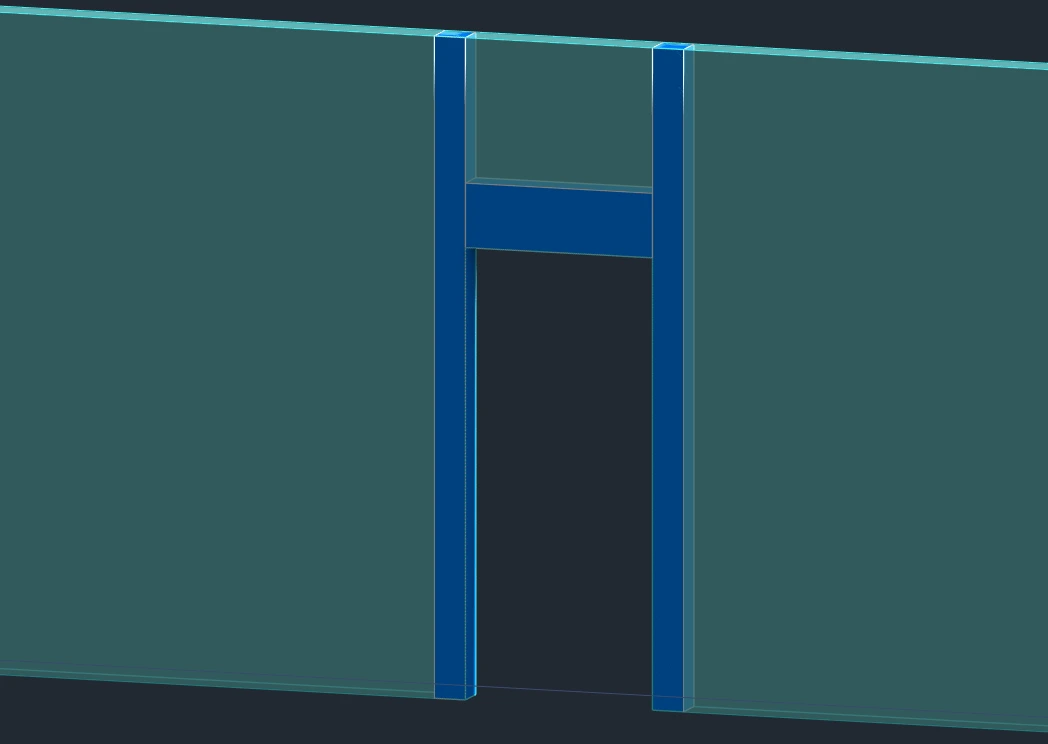
- Place king studs. Inspect both jambs and the header on a representative opening beneath the deck.
- After doors move or resize, run the same scope and Update again. Use Rebuild only when you want to replace unchanged generated framing too.
Expected result: Framing follows qualifying openings and can be reconciled after revisions.
Every button and parameter
Open a window or tab below to find its controls. Interface names match the plug-in; you can also search by function or unit.
13 of 13 reference entries
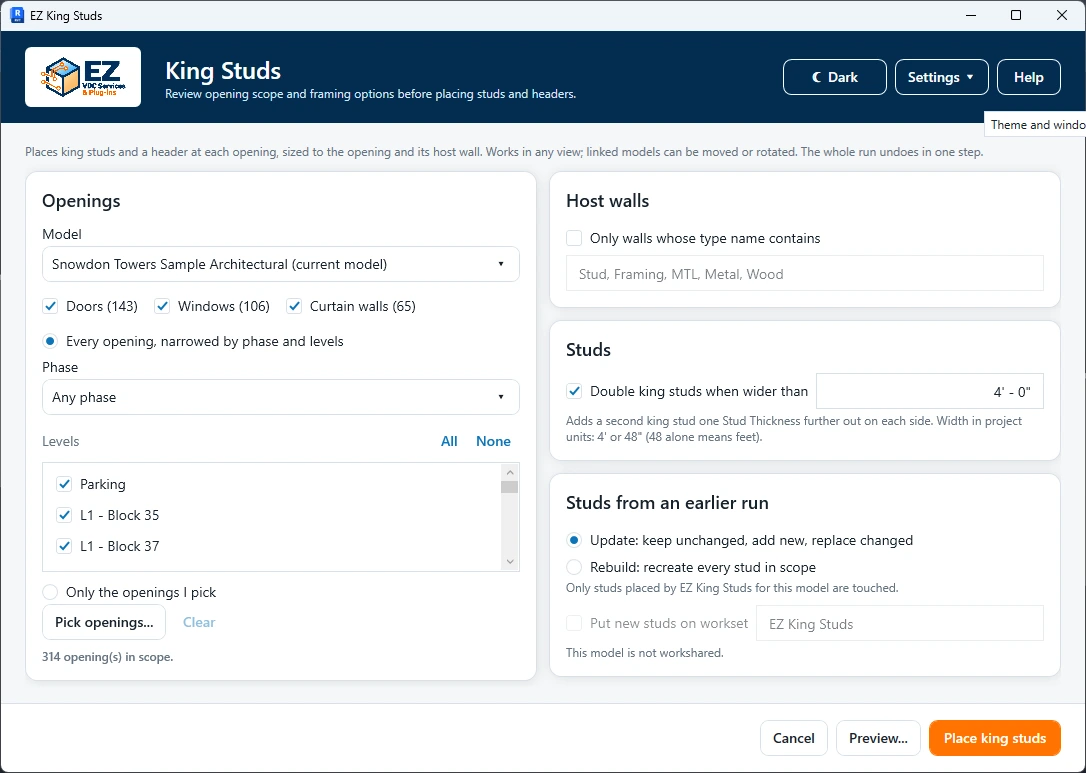
Choose openings
5 entries
Choose one source instance and a focused scope first. Length fields use the current project’s units.
- Model source
- Choose the host or a loaded link instance. Repeated instances of the same link are separate choices because placement depends on the instance transform.
- Doors / Windows / Curtain walls
- Each checkbox includes that opening category. Curtain walls must be embedded in a basic wall; doors or windows hosted by a curtain wall are not treated as basic-wall openings. Read the category counts after changing the source.
- Every opening · Phase / Levels / All / None
- Use the filtered mode for a repeatable batch. Select the phase and check levels; All checks the levels, None clears them. The resulting scope determines both additions and reconciliation of previous generated studs.
- Only the openings I pick · Pick / Clear
- Switches to explicit selection. Pick openings returns to Revit for selection; Clear removes that picked list. Existing preselection can seed the list. Check that picked elements belong to the intended source instance.
- Only walls whose type name contains
- Enable to restrict basic-wall types. Enter comma-separated, case-insensitive keywords such as Stud, Framing, MTL. For curtain walls, the filter evaluates the surrounding basic wall. Use this to exclude concrete or masonry openings.
Framing rules and existing elements
5 entries
The supplied King Stud Dynamo and Door_Header families provide the modeled geometry. The tool loads them when needed and reuses existing families.
- Double king studs when wider than
- Enable the rule and enter a width in project units. It applies only when the opening width is strictly greater than the threshold, not equal. The second stud is offset outward according to the family’s stud thickness.
- Update: keep unchanged, add new, replace changed
- Keeps unchanged generated framing, including its manual edits; adds new openings and replaces changed ones. Generated framing for deleted or no-longer-qualifying openings is reconciled within scope. Unrelated and out-of-scope elements are not part of this update.
- Rebuild: recreate every stud in scope
- Recreates the tool’s framing even when an opening is unchanged. Use for a deliberate reset; manual edits to generated framing in scope will be lost.
- Put new studs on workset · Existing / Add a workset / Name
- In a workshared host, choose an existing workset or Add a workset to reveal the new-name field. Enter a valid unique name for deliberate creation during placement. Preview does not create a workset. Unchecked uses the active workset; source-link worksets are not output destinations.
- How height and opening dimensions are determined
- Opening width/height uses available rough-opening data, then type/instance fallbacks. Stud tops follow the lower local wall top or overhead deck underside at each jamb. Windows account for sill height; deck searches respect geometric openings. Review unusual host and deck geometry in preview and 3D.
Preview, apply and result
3 entries
Preview is the opportunity to confirm scope and reconciliation before model edits.
- Preview…
- Runs a read-only comparison and reports new, changed, unchanged, removed and skipped openings. Read the skip reasons and counts before proceeding; return to settings to refine the scope.
- Place king studs
- Validates and confirms the operation, then creates or reconciles framing. Review the final counts and any skipped/failed openings; a successful batch can still contain individual skipped items.
- Cancel
- Closes the configuration without placing framing. During a large placement operation, progress cancellation stops after the current unit and retains completed work; use Revit Undo if you need to revert the completed batch.
Check the result
- Inspect opening width, wall thickness, sill/start height and both stud tops in a section. Compare the final result with the preview’s removals and skips.
Troubleshooting and limits
- Unsupported hosts, missing dimensions or curtain walls outside basic walls are skipped. Legacy untagged framing is not automatically adopted; resolve such duplicates separately before a production batch.
Running it again
Update keeps unchanged tracked studs and their manual edits; changed openings are replaced. Rebuild replaces all tracked studs in scope.